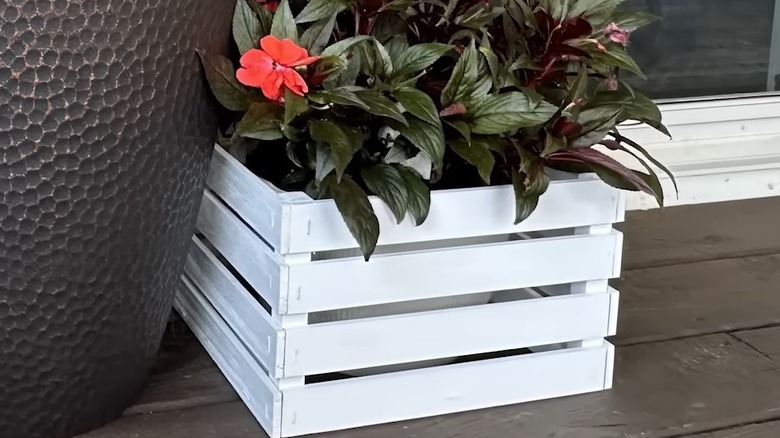
Planters are available in numerous shapes, hues, and dimensions. Frequently,buying the right planterschoosing the right garden accessories means selecting those that complement the overall design in terms of color and aesthetic. It’s common to stick with traditional planter styles, like standard terracotta pots and plain plastic saucers. What if you could create a distinctive, outdoor-themed planter using just a few pieces of wood for under $25? You can! All you need are someGrade Pine stakes, a pack of 5-gallon paint stir sticksand some tools. Even better, you can use some of the stir sticks you already have at home. You just need to carefully remove any dried paint from them. Also, think about re-sealing them, as this planter will probably be placed outside where it will be exposed to the elements.
This affordable DIY plantercan assist you in creating a garden area that is visually appealing and well-balanced — something that could encourage you to invest more time in enhancing your garden. The good news is that you don’t require many supplies to achieve this. However, in addition to your wooden elements, you will also needTitebond Premium wood glue, FolkArt chalk paintor some other spray paint hue, aNeu Master staple gunwith 1/2 inch staples, and aMetabo miter saw(although a reciprocating saw can be used). Except for the miter saw, sticks, and staple gun ($17), all other items can be bought for less than $10 each.
Read more: Creative Methods to Reuse an Old Box Spring Frame in Your Home and Yard
How to Create a Planter Using Paint Stir Sticks
Using your saw, cut the paint stir sticks into eight pieces that are 11 inches in length and another eight pieces that are 11½ inches long. Then, cut the garden stakes into four pieces that are 7 inches each and another four pieces that are 9½ inches long. On a table, position one of the 9½-inch stakes horizontally at the bottom between two of the 7-inch stakes. Apply glue to the ends of the 9½-inch piece and attach it to the 7-inch pieces to create a sort of “U” shape. Next, create another piece in the same way.
Attach an 11-inch stir stick to the bottom of each “U” shaped piece and secure it with staples at both ends. Do the same on the open end of the “U” pieces, then place two additional 11-inch stir sticks evenly between the top and bottom sticks of each piece. Fasten each stir stick to the stakes using staples. This is particularly important if you’re using recycled paint stir sticks that may not stick well with glue alone. Upright the two pieces so that the garden stakes are facing each other — you have now made two sides of the planter.
Next, attach the other two 9½-inch stakes to the bottom ends of the two planter sides, joining them to form the bases for the other two sides of your planter. Apply the remaining eight 11½-inch paint stir sticks to these sides, using four sticks per side. Make sure to staple the sticks to hold them in place. Lastly, position your planter on a piece of cardboard and spray it with paint.
Personalization Choices for Your Handmade Wooden Plant Container
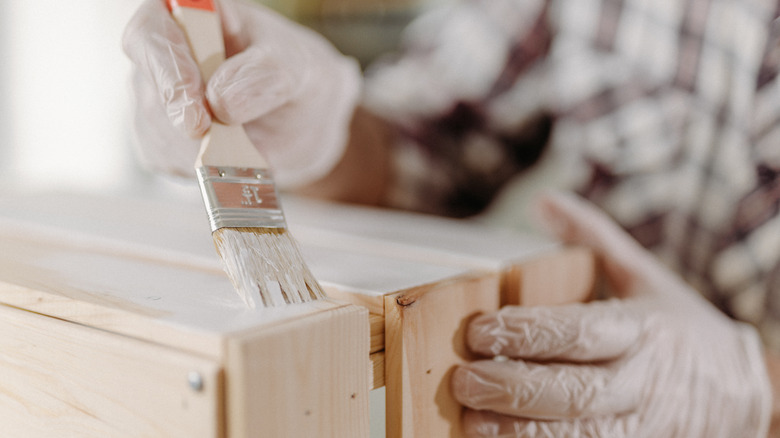
You might want to construct a larger or smaller planter based on your requirements. Make sure to take accurate measurements before cutting anything to avoid wasting your supplies. After finishing your planter, you can enhance its appearance with some stylish additions. Using a vibrant color like pink, blue, or green paint is an excellent way to highlight your new garden feature. If your objective is to create asingle color garden, consider painting it a lighter tone of the primary color, or even an accent color if you want it to be more noticeable. Alternatively, you could attach pieces of mosaic tile or stenciled artwork to the exterior of the planter for added style. However, make sure that any paint you use is safe for plants.
For a more celebratory appearance, try incorporating solar-powered fairy lights and decorative washi tape along the borders. You might also add a small chalkboard to label the planter — a feature that could serve as a unique element in your garden if you’re making several planters. You can also take anACRSIKR wood-burning penattach your preferred designs or quotes to the sides of the container. These pens can be bought online for approximately $20, and their kits usually include pre-created stencil patterns.
Liked this article? Subscribe to receive professional home advice, step-by-step DIY tutorials, and creative design ideas.House Digest newsletter!
Read the original article on House Digest.